
You can spark curiosity with ten easy, low‑cost experiments using everyday items. Try a rainbow Skittles diffusion by sprinkling candy around warm water, then watch colors spread. Explore surface tension with milk, food coloring, and a dab of soap that creates swirling patterns. Make oobleck from cornstarch and water to feel a non‑Newtonian fluid that solidifies under pressure. Test leak‑proof bags, build a layered density tower with honey, soap, water, and alcohol, erupt a baking‑soda volcano, launch a balloon rocket, and craft a lava lamp with oil, water, and antacid tablets. Each activity teaches core science concepts while keeping kids engaged, and the next sections will reveal even more fun ideas.
Kid‑Friendly Rainbow Skittles: Color‑Diffusion Experiment
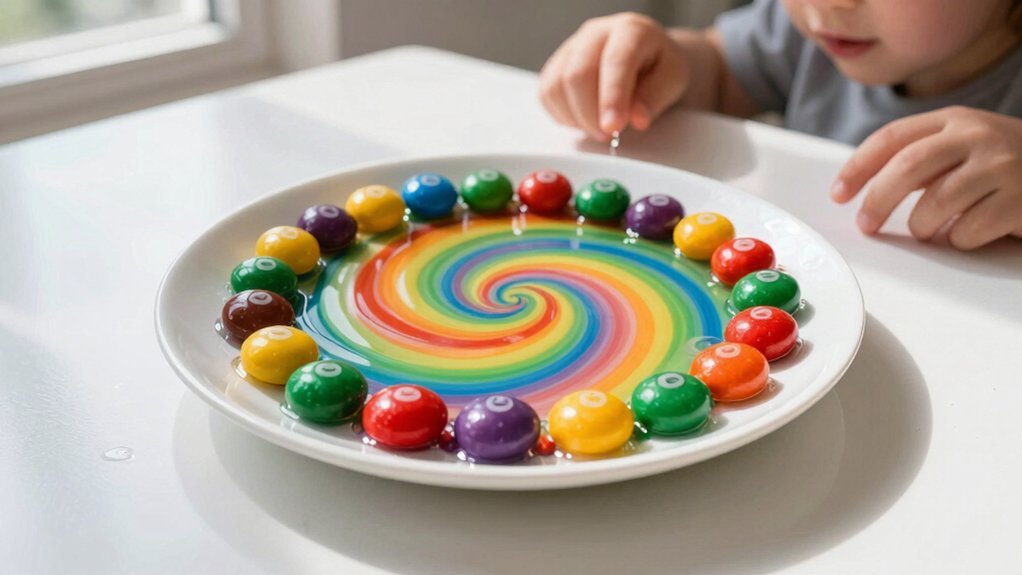
Eight Skittles placed around a plate’s rim and a splash of warm water in the center create a vivid rainbow that spreads as the candy’s sugar dissolves, showing diffusion in real time. You’ll notice the colors drift outward, merging into a seamless spectrum that illustrates how molecules move from high to low concentration. While the water warms, the sugar dissolves faster, so the rainbow forms quickly, letting you count to 27 as the hues expand.
This simple setup contrasts solid food coloring—here the Skittles’ sugar coating—with liquid dyes, highlighting different diffusion rates. With adult supervision, you can repeat the experiment, observe the changing patterns, and spark curiosity about molecular motion in everyday life. Engaging young learners with hands-on learning engagement helps make scientific concepts both accessible and memorable.
Magic Milk Swirl: Simple Surface‑Tension Science for Kids
Ever wondered how a simple splash of soap can turn a glass of milk into a kaleidoscope of colors? You’ll need whole or 2% milk, a few drops of food coloring, and a cotton swab dipped in dish soap. Pour milk into a shallow dish, add coloring spots, then touch the surface with the soap‑coated swab. The surfactant instantly lowers surface tension, breaking the fat layer and sending color racing outward in a vivid diffusion pattern. Kids science thrives on this visual cue, linking the invisible forces that hold liquids together with the bright swirls they see. The setup takes minutes, cleanup is easy, and supervision keeps the experiment safe and fun. Simple hands-on activities like this also promote fine motor skills and cause-and-effect understanding in young learners.
Play With Oobleck: Make a Non‑Newtonian Fluid Science Experiment
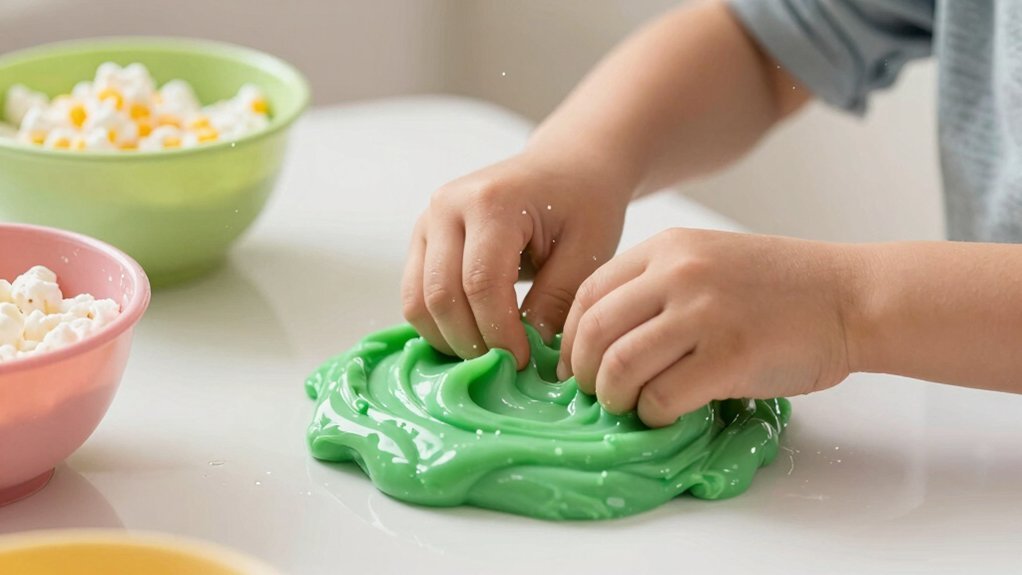
After watching colors race across milk, you can shift the focus to a hands‑on, mess‑friendly demonstration of how a material can act both like a solid and a liquid.
Mix equal parts cornstarch and water in a bowl, stirring until the mixture feels thick and scoopable—this is your non‑Newtonian fluid.
Tap it quickly and it resists, acting like a solid; let it sit and it flows, showing low viscosity.
Encourage kids to predict what’ll happen when they press, roll, or pour, then observe the sudden change in behavior.
Adjust the water amount to tweak thickness, or add a few drops of food coloring for visual flair.
This simple experiment illustrates shear resistance and state changes while sparking curiosity about material properties.
Many Montessori kitchen towers feature thoughtful height adjustability to support children’s growth and development through hands-on learning.
Test a Leak‑Proof Bag: Polymer‑Barrier Challenge for Kids
You’ll start by learning how polymers act as barriers that keep water inside even when punctured. Then you’ll follow the simple steps: fill a clear bag with water, poke a pencil through it, and watch the liquid stay put. Finally, you’ll note which bag material holds up best and discuss why the observations matter. Always ensure safety by using age-appropriate tools and supervised handling during experiments involving sharp objects.
Polymer Barrier Basics
How can a simple bag become a classroom‑size demonstration of polymer barrier science? You’ll see how a polymer barrier stops water from escaping when you poke a pencil through a filled bag. This bag experiment shows that the polymer network traps liquids, resists penetration, and illustrates leak prevention in everyday items. By comparing different bag materials or thicknesses, you discover which designs hold up best under puncture stress. The activity sparks conversations about food‑storage packs, medical packaging, and protective gloves, while reminding you to supervise sharp tools and keep the water contained.
- Observe how polymers block water flow.
- Test multiple bag types for leak prevention.
- Discuss real‑world uses of polymer barriers.
This experiment can be enhanced by using tools with extending reach capabilities to safely manipulate the bag during testing.
Leak‑Proof Test Steps
Wondering how to turn a simple bag into a convincing leak‑proof challenge? First, pick a sturdy zip‑lock bag and spread a thin layer of polymer barrier over its interior surface, smoothing it out to avoid bubbles. Seal the bag tightly, then pour a measured amount of water—about 100 ml—into the cavity.
Next, begin the test sequence by gently pressing the bag between your palms, increasing pressure in small increments. Observe for any signs of leakage, noting the exact moment a droplet appears and how long it takes. Record whether the polymer barrier holds, the time to first leak, and any visual changes on the bag’s exterior. Repeat the pressure steps three times to ensure reliable data for your analysis.
This experiment demonstrates the non-porous material properties that prevent liquid seepage effectively.
Kids’ Observation Tips
When kids watch a pencil pierce a water‑filled bag, they can instantly see whether the polymer barrier holds or leaks, turning a simple test into a vivid lesson on material strength. Guide them to note the exact moment a droplet forms, the size of the seepage, and how long it takes to spread. Encourage them to compare different bag materials, recording each observation in a notebook. Remind them to keep the experiment method consistent: same water level, same pencil pressure, and same timing. This disciplined observation builds scientific thinking and helps them understand why some polymers resist puncture better than others. Exploring food-grade polypropylene in everyday items like child-safe kitchen tools can enhance understanding of safe, durable materials.
- Write down the first leak spot and time it appears.
- Rate each material on a simple 1‑5 scale for leak resistance.
- Sketch the bag before and after the test to visualize changes.
Layered Density Tower: Density‑Based Liquids Experiment for Kids
You’ll start by layering honey, dish soap, water, and rubbing alcohol to see how each liquid settles based on its density.
Follow the simple steps: pour each liquid slowly into a clear container, letting it flow down the side to keep the layers separate.
As the tower forms, you’ll observe distinct boundaries and learn why denser liquids sink while lighter ones float.
Layered Liquids Overview
Ever wondered why a glass can hold honey, soap, water, and alcohol in perfectly separate layers? You’ll see density at work: each liquid’s mass‑to‑volume ratio determines its place in the tower. By pouring slowly along a spoon or down the glass wall, you create clean layering without mixing. The heaviest liquid, honey, settles at the bottom, then dish soap, water, and finally the lightest rubbing alcohol crowns the top. This visual cue lets kids predict outcomes, test the density = mass/volume formula, and watch how long the liquids stay distinct. It also links to everyday puzzles like why objects float or sink.
- Predict the order before pouring
- Observe how each liquid settles
- Notice how long the layers remain stable
Setup Instructions Steps
Gather your clear, tall glass, a spoon, and the four liquids—honey, dish soap, water, and rubbing alcohol—then line them up in order of decreasing density. Start by slowly pouring honey into the glass; its high density anchors the tower. Next, drizzle dish soap over the back of a spoon to let it glide atop honey without breaking the layer. Follow with water, using the same spoon technique, and finish with rubbing alcohol, which floats at the top. Keep each pour gentle and avoid stirring; the subtle layering of liquids reveals density differences and prevents mixing.
| Step | Action |
|---|---|
| 1 | Pour honey |
| 2 | Add dish soap |
| 3 | Introduce water |
| 4 | Top with rubbing alcohol |
Observations & Learning Outcomes
What do you notice when the liquids settle into neat, separate bands? You see crisp, colorful layers that stay distinct unless you disturb them, highlighting how density determines each liquid’s position. Your observations reveal that the densest fluid sits at the bottom while the lightest floats atop, and any shaking blurs the boundaries as the liquids mix. These visual cues turn abstract concepts into tangible learning outcomes: you grasp that density equals mass divided by volume, recognize how temperature or sugar content can shift density, and understand why careful pouring preserves the tower’s structure.
- Spotting clear layer boundaries and noting any blending.
- Connecting layer order to each liquid’s density.
- Discussing how temperature or solutes alter density and affect the experiment.
Elephant Toothpaste Foam: Fast‑Foaming Chemical Reaction for Kids
Curious how a simple kitchen staple can erupt into a towering cloud of foam? You’ll mix hydrogen peroxide, a splash of dish soap, and yeast—your catalyst—to trigger a rapid, exothermic reaction. The yeast breaks down the peroxide into water and oxygen, and the gas bubbles through the soap, creating a massive, warm foam that shoots out of the bottle. Kids watch the fizzing, feel the heat, and grasp catalysis, gas production, and foam dynamics in seconds.
| Step | Ingredient | Role |
|---|---|---|
| 1 | Hydrogen peroxide (6%) | Reactant |
| 2 | Dish soap | Foam stabilizer |
| 3 | Yeast (dry) | Catalyst |
| 4 | Warm water | Activates yeast |
| 5 | Container (wide‑mouth) | Reaction site |
| 6 | Safety goggles | Protection |
You’ll see the foam rise, hear the hiss, and hear kids exclaim, “Science is magic!”
Volcano Eruption: Baking‑Soda‑Vinegar Science Experiment for Kids
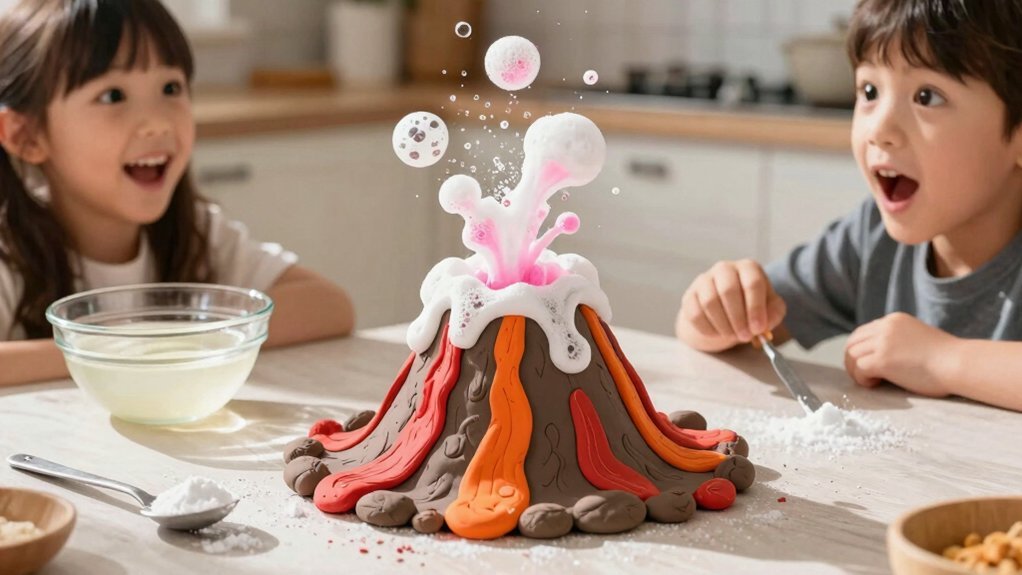
Ever wondered how a simple kitchen pantry can mimic a real volcano? You’ll need a small bottle, baking soda, vinegar, and a splash of food coloring. Build a clay or play‑dough mound around the bottle, place it on a tray, and pour the coloring into the vinegar. When you dump baking soda into the vinegar, a fizzy volcano eruption erupts, spewing foamy lava that illustrates an acid‑base reaction and the rapid release of carbon dioxide gas. Adjust the amounts to control height and duration, or swap vinegar for lemon juice for a tangy twist. The experiment stays safe, visual, and endlessly exciting for curious kids.
- Simple container and tray setup
- Food‑colored vinegar for vivid lava
- Adjustable baking soda and vinegar ratios for varied eruptions
Balloon Rocket Physics: Newton’s Third Law Demonstration for Kids
You’ll set up a string‑guided track, tape a balloon to a straw, and let the air rush out to launch the “rocket.”
As the balloon expels air, you’ll see the equal and opposite reaction push it forward, illustrating Newton’s third law.
Launch Mechanics
How does a simple balloon launch a rocket across a string? You’ll see that the balloon’s rapid gas release pushes against the air, and the equal‑and‑opposite reaction propels the rocket forward along the launcher.
By tightening the string, adjusting balloon size, and balancing rocket mass, you control speed and distance without the rocket drifting.
- Vary balloon volume to feel how more air means a stronger thrust.
- Change string tension to observe its effect on acceleration.
- Experiment with rocket weight to see how mass slows or speeds the launch.
Remember to keep sharp edges away, secure the launcher, and supervise any pressurization. This hands‑on setup turns Newton’s third law into a vivid, measurable demonstration for kids.
Action‑Reaction Demonstration
When the balloon’s air rushes out, the equal‑and‑opposite push thrust the straw‑rocket forward along the taut string, turning Newton’s third law into a visible, hands‑on lesson. You’ll need a standard party balloon, a drinking straw, string or fishing line, and tape. Thread the straw through the string, tape the balloon’s nozzle to the straw’s side, and pull the string tight. Inflate the balloon, pinch the tip, then let go. The air expels rearward, creating forward propulsion via action‑reaction. Kids watch the balloon rocket zip along the line, linking theory to motion. Keep the balloon modestly inflated to avoid popping, and supervise every step.
| Item | Purpose | Tip |
|---|---|---|
| Balloon | Source of thrust | Use a regular party balloon |
| Straw | Rocket body | Tape securely to the balloon |
| String | Track | Keep it taut and straight |
| Tape | Secure connections | Apply firmly, avoid loose ends |
DIY Lava Lamp: Oil‑Water‑Antacid Tablet Experiment for Kids
A DIY lava lamp starts with a clear bottle filled with water, a few drops of food coloring, and a layer of oil that floats on top because it’s less dense. You then drop an antacid tablet, and the chemical reaction releases carbon dioxide bubbles that rise through the oil, burst, and sink back down, creating a mesmerizing flow. The oil’s lower density keeps it separate from the water, so the colorful bubbles travel without mixing, illustrating density differences and gas production in a single, eye‑catching demonstration.
- Watch bubbles surge, pop, and drift like real lava.
- Observe how oil and water stay distinct despite agitation.
- See a simple chemical reaction turn a kitchen item into a science spectacle.
Cleaning Up & Safety Tips for Messy Kids’ Science Experiments
Even if the experiment leaves a rainbow of spills, a quick, organized cleanup keeps the fun safe and stress‑free. You’ll want disposable towels or rags, a basin for washing tools, and a dedicated waste bag for chemical or food scraps to avoid cross‑contamination. Before you start, list a clear setup, step‑by‑step directions, and a cleanup checklist so spills stay contained.
Safety tips include wearing goggles and aprons, keeping helpers away from hot surfaces or small choking hazards, and always supervising young learners. In the kitchen, use labeled, child‑safe containers and never mix unknown substances; test for allergies if dyes or powders are involved.
After the experiment, wash hands thoroughly, return materials to proper storage, and note observations for future safety planning.
Frequently Asked Questions
Can I Use Food Coloring Instead of Skittles for the Rainbow Experiment?
Yes, you can swap Skittles for food coloring—just add a few drops to each cup of water, stir, and watch the colors spread, creating a bright, tasty rainbow effect.
What Household Items Can Replace Cornstarch in Oobleck?
You can swap cornstarch with flour, powdered sugar, or instant potato flakes—just mix one of those with water until it feels thick and non‑Newtonian, then test its oobleck properties.
How Long Does the Elephant Toothpaste Reaction Last?
You’ll see the foam erupt for about 30 to 60 seconds, then it quickly subsides as the reaction finishes and the mixture cools, leaving only a few minutes of visible activity.
Is It Safe to Ingest Any of the Experiment Materials?
No, you shouldn’t ingest any of the materials. The chemicals—hydrogen peroxide, dish soap, food coloring, and catalysts—are toxic or irritating if swallowed, so keep them strictly for external use only.
Can the Volcano Eruption Be Repeated With Other Acids?
Yes, you can repeat the volcano eruption with other acids like citric or acetic acid, but keep concentrations low, use safe containers, and wear goggles; the reaction’s fizz and heat will still impress.