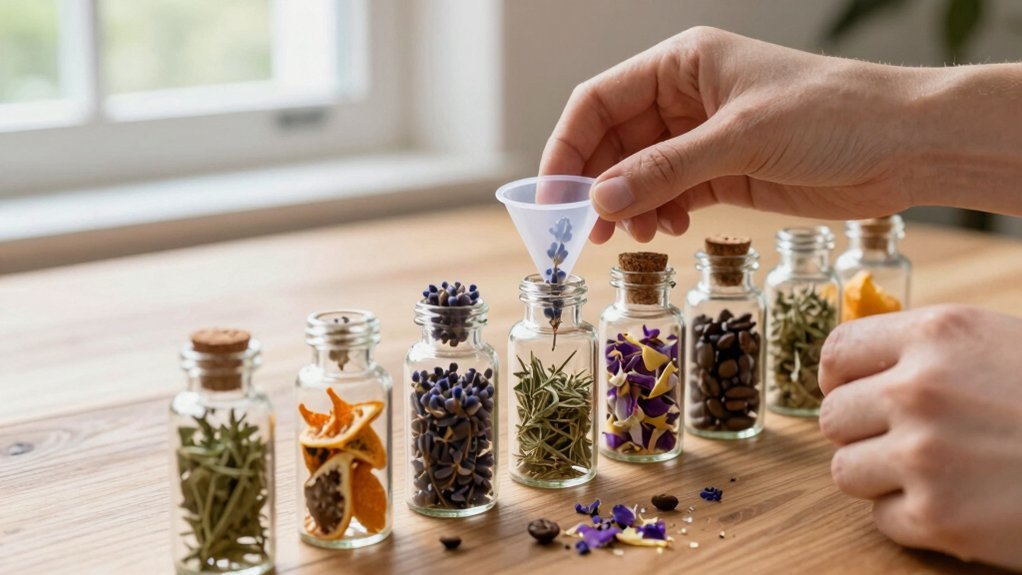
Pick 3‑5 child‑friendly essential oils, get two identical glass jars per scent, and drop 1‑3 drops onto a cotton ball or fabric square. Tuck the scented ball inside each jar, seal tightly, and label the lid and base with matching colored stickers so you never mix pairs up. Keep the jars upright in a cool, dark spot, swapping the cotton balls every 1‑2 weeks to keep the aromas fresh. Follow these steps and you’ll set up a solid olfactory‑training kit, plus more tips ahead.
Prepare Montessori Smelling Jars
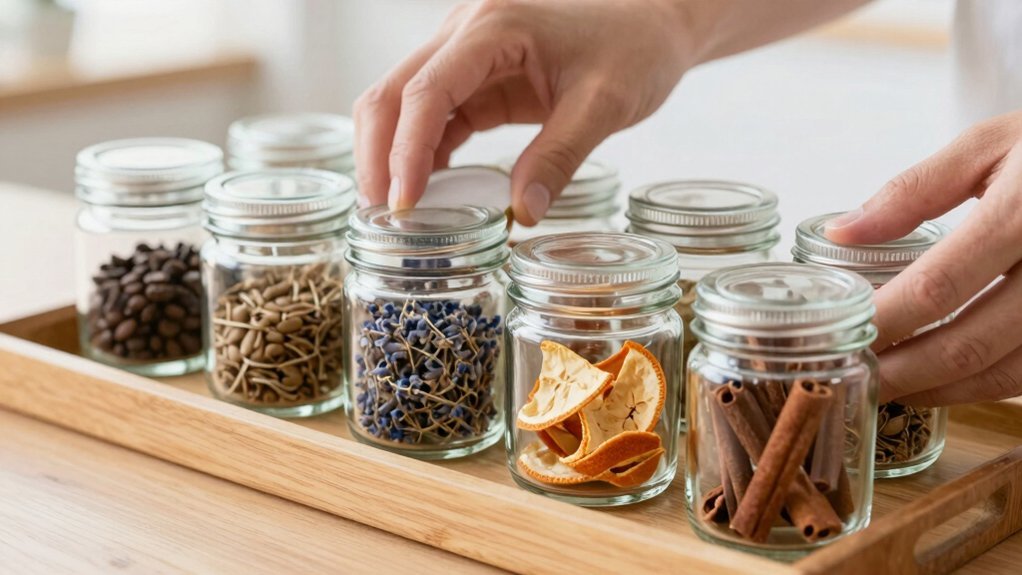
How do you set up Montessori smelling jars for olfactory training? You start by selecting 3–5 scents and gathering two identical jars for each. Drop a few drops of essential oils onto a cotton ball or fabric square, then tuck it inside the jar and seal it tightly. Use the same process for the matching jar so both contain the same scent. Label the bottoms with colored stickers if you want to track pairs and avoid mix‑ups. Arrange the jars so children can compare and match the aromas during activities. Remember to replace the cotton balls every one to two weeks to keep the smells fresh and prevent cross‑contamination. This simple setup gives you reliable smelling jars for effective olfactory training. For maintaining a clutter-free and efficient workspace, consider tools with compact design emphasis to keep your area tidy during preparation.
Add Essential‑Oil Scented Cotton Balls
Choose oils that stand out—peppermint, lemon, lavender, eucalyptus—and match them to the training goals.
Drop two or three drops onto a cotton ball, then press the ball gently into the bottle so it stays snug and won’t shift.
Label each bottle and keep the oils sealed away from light to preserve their potency.
For enhanced sensory engagement, consider incorporating multisensory methods such as tactile tracing to complement olfactory training.
Choosing Appropriate Essential Oils
Which essential oils will give you the most recognizable, safe scents for training? Pick oils that most people can identify instantly—peppermint, lavender, lemon, jasmine, cinnamon, and eucalyptus work well. Start by testing each oil on a spare cotton ball: two to three drops per ball creates a clear scent without overwhelming the jar. Use two to three scented balls per jar for balance, and make identical pairs so participants can match odors reliably. Keep your essential oils tightly capped, stored away from sunlight, and check safety data before use; some users may react to strong oils, so have alternatives like lemon juice or fresh herbs on hand. Label each jar clearly with the oil name to avoid confusion during the exercise. For added convenience and organization, consider using storage solutions with features like hanging holes and snap fasteners that facilitate easy access and tidiness when handling multiple scented jars.
Securing Cotton Balls Properly
After selecting your preferred oils, place one or two scented cotton balls into each bottle, then close the lid tightly to lock in the aroma. You’ll want an airtight seal so the scent stays strong and no leaks occur. If the cap isn’t screw‑type, wrap the cotton ball in a thin fabric patch before screwing the lid on; this adds friction and keeps the ball from shifting. Label each bottle if you mix scents, and swap out the cotton balls every 1–2 weeks to avoid cross‑contamination. Using containers with spill prevention technology helps maintain the integrity of the scent while preventing leaks.
| Issue | Solution | Frequency |
|---|---|---|
| Loose lid | Screw on firmly | Every use |
| Non‑screw cap | Wrap cotton ball in fabric | Every use |
| Scent fading | Replace cotton balls | 1–2 weeks |
| Cross‑contamination | Label lids | As needed |
| Leakage | Verify airtight seal | Every use |
Label Jars and Lids for Matching

Label both the jars and their lids so you never mix up a scent—Lemon lid with Lemon jar, Rose lid with Rose jar, and so on. Consistent labeling and pairing keep your training set reliable, especially as lids absorb faint aromas over weeks. Choose a clear font or printed stickers that survive moisture, then apply the same tag to the matching lid. If all lids share one color, differentiate them with two‑tone sticker dots; one color for the jar, another for the lid. This visual cue reinforces the correct pairing each time you reach for a bottle, preventing accidental swaps that could confuse your olfactory practice.
- Use waterproof labels on both jar and lid.
- Add a colored dot or symbol on lids when they’re identical.
- Keep a master list matching each label to its scent.
- For added durability, select labels made from polyester or similar wrinkle-resistant materials to withstand frequent handling and washing.
Teach Children Safe Scent Exploration
Pick kid‑friendly scents and keep the bottles out of reach when you’re not supervising. You’ll guide them to handle each jar gently, reminding them to sniff, not touch, the cotton ball. Rotate the aromas every couple of weeks so the smells stay fresh and the experience stays safe. Using tools like a Kitchen Step Stool for Kids with Safety Rail can help children safely explore scents at counter height while maintaining independence.
Choose Kid‑Friendly Scents
A few gentle scents—like lemon, peppermint, lavender, or orange—are perfect for kids because they’re safe, non‑irritating, and easy to recognize. You’ll want to use essential oils sparingly, about 1–3 drops per cotton ball, so the aromas stay mild and won’t overwhelm tiny noses. If you’re uneasy about oils, try lemon juice or dried herbs as natural alternatives. Prepare two identical bottles for each scent; kids can match pairs and compare smells without confusion.
- Use 1–3 drops of essential oil per cotton ball to keep scents subtle.
- Opt for natural substitutes like lemon juice or dried herbs when oil safety is a concern.
- Label each pair of bottles clearly to support matching games and sensory focus.
Integrating sensory exploration tools alongside smelling bottles can enhance tactile and cognitive development in young learners.
Supervise Scent Handling
One key rule when kids explore scents is to stay right beside them, handling jars, oils, and cotton balls together. You keep the smelling bottles within arm’s reach, so you can guide each step—label the lids, use color‑coded stickers, and demonstrate how to hold a jar away from the nose. Teach them to take short, gentle breaths instead of sniffing directly from the bottle. Your supervision prevents spills, accidental ingestion, and overwhelming reactions.
Introduce only a few scents at a time, pause if a child looks uneasy, and reassure them with calm encouragement. When the session ends, store the jars upright in a cool spot, out of sight, to keep the scents fresh and the area safe.
Rotate Scents Regularly
Ever wondered how to keep a child’s olfactory training fresh and engaging? Rotate the scents in your smelling bottles every 1–2 weeks to prevent olfactory fatigue and keep curiosity alive. Use a fresh jar or new scent item for each Rotation, and avoid cross‑odour by swapping out cotton balls. Keep jars tightly capped, store them away from sunlight, and label each with the scent name and rotation date. Watch the child’s reaction and tweak the number of jars or scent strength if they seem overwhelmed.
- Replace cotton balls and jars regularly.
- Store bottles in a cool, dark place.
- Record scent name and rotation date on each jar.
Play the Herb‑Matching Game
The herb‑matching game lets your child sniff each bottle and pair it with the matching “Herb Printable for Smelling Bottles.” Bright garden‑herb pictures on the printable guide them, while scents like peppermint, lavender, and oregano spark thoughts about strength, flowers, and food. You set up four pairs of bottles—two with lemon‑rose‑like aromas and two with distinct herbs—so the child can compare consistently. Encourage them to point to the picture that matches the scent, reinforcing vocabulary and sensory discrimination. Use child‑grade‑appropriate essential oils, but verify safety first; consider natural alternatives such as lemon juice or pressed herbs if needed. This hands‑on approach mirrors Montessori principles, letting the child explore, match, and label at their own pace.
Maintain Freshness of the Jars

Keeping your smelling bottles fresh is simple: swap out the oils every four to five months, cap them tightly, and store them away from direct sunlight. When you replace a scent, rinse the jar in plain boiling water—no soap—to strip any residue. Use a brand‑new jar for each new essential oil, because old lids can cling to previous aromas and muddle your training. For optimal storage, keep the bottles in a cool, dark place; a refrigerator works wonders for extending shelf life.
- Boil jars before refilling to avoid cross‑contamination.
- Seal caps securely after each use.
- Keep jars in a dark, cool storage area, preferably refrigerated.
Explore More Montessori Scent Activities
Fresh jars open up a world of Montessori scent games beyond simple matching. You can turn smelling jars into a scent‑sorting station, laying out three to five essential oils on cotton balls and asking the child to group them into “sweet” and “spicy” piles. After each round, prompt the child to name the aroma, describe its texture, and compare it to a familiar food or flower. Swap the cotton balls every week to keep the smells vivid and safe. Introduce a “scent‑story” activity: the child selects a jar, imagines a scene that fits the scent, and narrates it, building vocabulary and scientific curiosity. You’ll see independent handling, sensory memory, and language skills blossom as the child explores these fragrant challenges.
Frequently Asked Questions
How to Make a Smelling Bottle?
You gather an amber jar, cut a paper disc to fit its bottom, drop seven or eight essential‑oil drops, add a cotton ball, seal tightly, label it, then refrigerate for fresh, safe smelling.
What to Put in Montessori Smelling Bottles?
You’ll fill each bottle with a cotton ball soaked in 2‑3 drops of essential oil—lemon, peppermint, lavender, oregano, rose, clove, eucalyptus, jasmine, cinnamon, vanilla, orange, or coconut—then cap tightly.
What Containers Are Used for the Smelling Bottles?
You use 30 ml amber glass jars with tight‑fitting lids—often the small, clear‑capped bottles you find in spice sections. They’re easy to clean, odor‑resistant, and let you label or color‑code each scent.
What Scents Are Good for Olfactory Training?
You’ll want bright, distinct scents like lemon, peppermint, lavender, oregano, vanilla, orange, coconut, rose, eucalyptus, and jasmine; they cover a wide range of notes and stay recognizable during training.