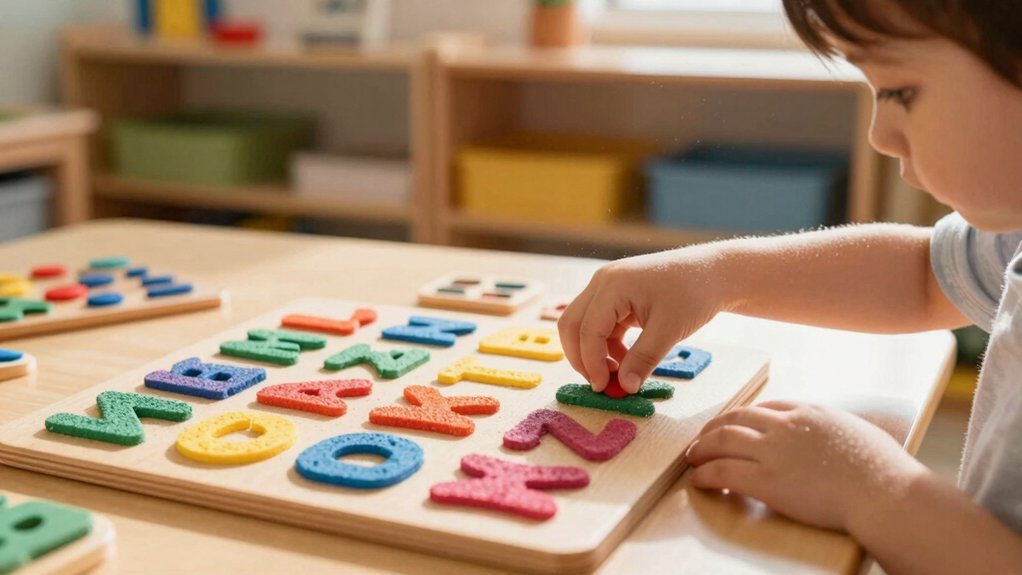
You’ll feel the gritty sandpaper as you trace each lowercase letter, then hear its phoneme, which ties the shape to the sound in your brain. Repeating this tactile‑visual‑auditory loop builds strong neural pathways, so the symbol becomes a concrete cue for the abstract sound. The three‑period lesson reinforces the link by having you point, trace, and vocalize, while picture cards add meaning. Mastering these steps sharpens fine‑motor control and solidifies phoneme‑grapheme connections, setting you up for the next level.
What Are Sandpaper Letters?

Sandpaper letters are textured, lowercase letter tiles that let you trace each shape with your fingertips. You pick up a tile, feel its raised edges, and slide your finger along the curve, hearing the corresponding phoneme as you go. This tactile‑visual‑auditory combo turns abstract symbols into concrete sensations, so you associate the shape of “b” with the sound /b/ before you ever read a word. The tiles usually come in small, phonemically grouped sets, letting you explore independently and build confidence. By guiding your hand through the correct motion, Sandpaper letters develop fine‑motor memory and handwriting readiness, laying a solid foundation for later reading and word‑building activities. Using cushions like the Eight-Piece Classroom Reading Corner Cushions can create a comfortable, inviting space that enhances engagement during learning activities.
Why Tactile Tracing Boosts Letter Learning
When you trace sandpaper letters, the tactile feedback ties the shape to its sound, so your brain stores the connection more firmly. The repeated motion sharpens your fine‑motor control, laying the groundwork for smooth handwriting later. By linking touch, sight, and hearing, you strengthen the neural pathways that bind each letter to its phoneme. Engaging children with fine motor skill development activities, like feeding and caring for baby dolls, further reinforces these foundational skills.
Sensory Integration Enhances Memory
Sensory integration turns learning into a multi‑dimensional experience, and tracing sandpaper letters with your fingers taps into proprioception and touch. You feel each ridge, hear the soft rustle of the paper, and see the shape, so your brain links the visual glyph to its sound through multiple pathways. This layered encoding makes recall faster and more reliable, especially when you encounter the letter in a new context.
1. Proprioceptive reinforcement – finger pressure solidifies the letter’s contour in memory.
22. Multisensory synergy – visual, auditory, and tactile cues converge, strengthening phoneme‑grapheme bonds.
33. Active manipulation – self‑directed tracing creates stronger neural pathways than passive viewing.
4. Repeated exposure – consistent tracing across lessons embeds sound‑symbol correspondences for quick decoding.
Additionally, using adjustable child-size aprons during activities helps maintain safety and comfort, allowing children to focus fully on sensory learning without distraction.
Fine Motor Skill Development
How does a simple finger trace turn shaky scribbles into confident handwriting? You press a sandpaper letter with your fingertip, feeling the bumps as you follow each stroke. That tactile feedback forces your hand to adjust grip, pressure, and motion, sharpening fine motor skills. Each repeatable trace builds muscle memory, so your fingers know exactly where to start, move, and stop. The three‑period lesson—point, trace, finish—creates a clear motor sequence that your brain stores as a motor plan. As you repeat the pattern, neuro‑motor pathways fire faster, letting you reproduce letters with less effort and greater accuracy. Over time, this practice translates into smoother, more reliable handwriting, laying a solid foundation for reading and writing fluency. Using tools with ergonomic handles can further enhance fine motor development by providing comfortable and secure grip during practice.
Neural Pathways Strengthen Letter‑Sound Links
The fine‑motor gains you just built with sandpaper letters now feed directly into the brain’s sound‑letter network. Each tracing stroke fires sensorimotor pathways that bind a letter’s shape to its phoneme, so your brain stores a tighter, more durable link. As you repeat the motion, fine‑motor memory solidifies, letting you retrieve the sound instantly when you see the symbol. Multisensory activation—seeing the letter, hearing its sound, feeling the texture—boosts encoding efficiency, reducing the cognitive load of decoding new words. Neuroimaging shows that motor‑auditory co‑activation during tracing predicts higher reading fluency than visual‑only practice. Using tools designed with fine-motor grip control can further enhance tactile learning and engagement in children.
- Engage tactile feedback.
- Strengthen motor‑auditory circuits.
- Build automatic letter‑sound retrieval.
- Accelerate decoding speed.
How the Three‑Period Lesson Builds Phonemic Awareness
Phonemic awareness blossoms when children repeatedly link sounds to symbols, and the Three‑Period Lesson orchestrates that growth through a clear, step‑by‑step routine. In Period 1 you introduce a letter and its sound, letting the child trace the shape while vocalizing the phoneme.
Phonemic awareness thrives as children repeatedly associate sounds with symbols via the structured Three‑Period Lesson.
Period 2, the longest phase, has you point to or touch the letter in response to auditory prompts, cementing recognition before moving to production.
Period 3 asks the child to name the sound when you show the letter, reinforcing the abstract link. You keep presentations crisp, avoid lingering tracing errors, and use multisensory pictures to boost memory.
Repetition and guided practice strengthen phonemic awareness, laying a solid foundation for decoding and early reading. Incorporating Montessori tools, such as sandpaper letters, enhances this multisensory learning experience and supports independent exploration.
Tracing the Letter While Saying Its Sound

When you trace a sandpaper letter while saying its sound, you link shape and phoneme in one smooth motion. This multisensory step builds muscle memory and sharpens sound‑symbol awareness.
Keep the tracing brief and focused, and you’ll see faster mastery across letter groups. Using materials with child-safe coatings ensures a safe and durable learning experience for toddlers.
Multisensory Letter Tracing
Multisensory letter tracing lets you feel the sandpaper texture, see the shape, and say the sound all at once, creating a strong sound‑symbol link. You grip the gritty surface, watch the curve form, and voice the phoneme, so the brain binds the visual, tactile, and auditory cues. This active, kinesthetic loop builds durable memory and prepares you for independent decoding.
- Tactile feedback – the rough paper reinforces the letter’s outline, grounding the symbol in your fingertips.
- Visual reinforcement – tracing outlines the shape, helping you recognize the letter in print.
- Auditory pairing – saying the sound while moving creates a neural bridge between symbol and phoneme.
- Motor consistency – using one or two fingers guides proper start points, smoothing future handwriting.
Sound‑Synchronized Finger Movement
A smooth, rhythmic glide of your finger across sandpaper while you say the letter’s sound locks the shape and phoneme together. You start at the letter’s beginning, trace the proper stroke, and vocalize the phoneme in perfect sync. This sensorimotor cue blends visual shape, tactile sandpaper texture, and auditory output, forging a strong phoneme‑grapheme link.
Each repetition reinforces the neural pathway that maps motor motion to speech sound, sharpening phonetic awareness. As you move your hand, the brain registers the coordinated pattern, making the letter’s sound unforgettable. Consistent practice with Sandpaper Letters builds durable connections, preparing you to decode whole words later and turning abstract symbols into concrete, audible knowledge.
Developing Fine‑Motor Skills for Handwriting
Tracing sandpaper letters repeatedly builds the fine‑motor control and pincer grip you need for precise handwriting. You’ll notice smoother strokes as you follow guided three‑period lessons that highlight start points and fluid motion, cutting down on sloppy muscle memory. The gritty texture offers proprioceptive feedback, turning each trace into a motor memory that later becomes automatic. Focusing first on lowercase forms aligns with Montessori’s goal of creating a legible script before tackling capitals. Repeating varied letter shapes strengthens neural pathways, securing long‑term accuracy.
- Start with a clear anchor point for each letter.
- Use consistent pressure to feel the sandpaper’s texture.
- Transition from lowercase to uppercase only after mastery.
- Vary letter sizes to reinforce fine‑motor adaptability.
Multi‑Sensory Benefits for Early Reading Brain Development
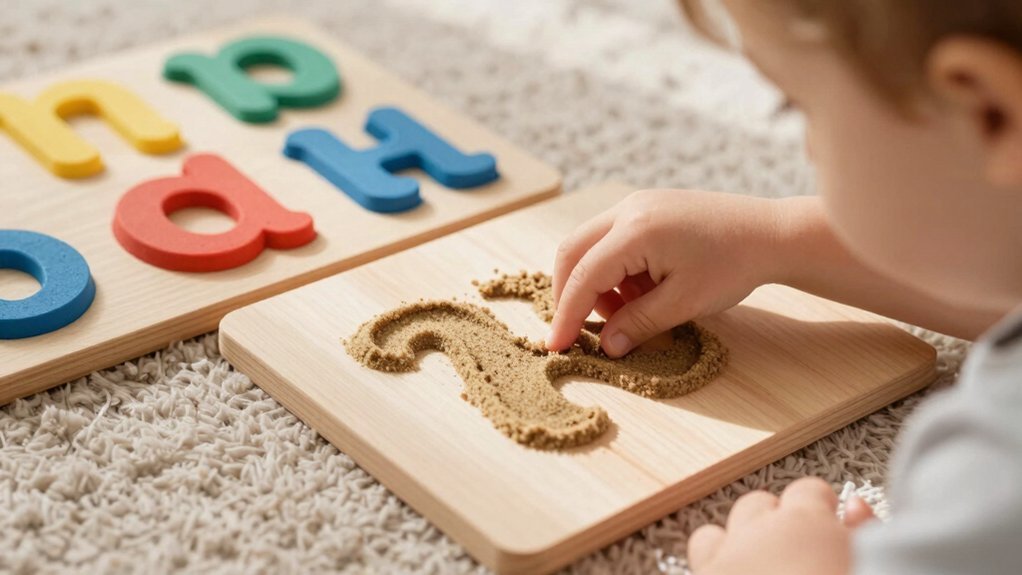
Because sandpaper letters stimulate sight, touch, and sound together, they create a rich, multi‑sensory experience that helps your brain form stronger connections between letter shapes and their sounds. When you trace a sandpaper letter, your eyes track the shape, your fingertips feel the texture, and you hear the associated phoneme. This simultaneous activation of visual, tactile, and auditory pathways encodes the symbol more robustly than a single‑sense approach.
The fine‑motor memory you build reinforces neural circuits for letter recognition, while the paired sound boosts retention of sound‑symbol links. Repeating the three‑period lesson solidifies these pathways, fostering independent learning and early phonemic awareness that underpins fluent reading.
Sequencing Sounds Before Letter Names: Montessori Rationale
You’ll notice that Montessori puts phonetic sounds before letter names, so you hear the sound first and then trace the sandpaper shape. This sensory‑first approach builds phonemic awareness and lets you decode words before memorizing names. By grouping letters by sound and practicing in small sets, you develop early decoding skills that speed up reading.
Phonetic First Emphasis
When you introduce sandpaper letters, you start with the sound each symbol makes—/a/, /b/, and so on—so children form a direct link between phoneme and symbol before they even learn the letter’s name. This phonetics‑first approach lets them hear, feel, and say the sound, building a solid auditory foundation. You then move to the three‑period lesson: trace the shape, articulate the sound, and finally name the letter. By focusing on a small, controlled set, you sharpen phonemic discrimination, which later supports decoding and abstract reading. The result is a smoother shift from sound to word, reducing reliance on rote letter‑name memorization.
- Sound‑first exposure strengthens phonemic awareness.
- Tracing reinforces tactile‑auditory coupling.
- Small groups boost discrimination accuracy.
- Gradual naming cements symbol‑sound connections.
Sensory Integration Priority
Phonetic first exposure sets the stage for Montessori’s sensory integration priority, where the sound comes before the name. You’ll feel the rough texture of Sandpaper Letters while you hear the corresponding phoneme, letting the auditory cue anchor the tactile trace. This sequencing builds a strong sound‑symbol link before you even label the letter, reinforcing phonemic awareness. The three‑period lesson lets you master the sound in Period 3, then connect it to the visual shape, ensuring the mental representation of the phoneme stands alone. Research shows that this multisensory approach improves spelling and reading outcomes because the brain associates the sound with the feel, not the name. By starting with lowercase phonetic sounds and tracing them, you create durable, abstract reading foundations.
Early Decoding Skill Development
The Montessori approach starts decoding by having children hear a phoneme and trace its Sandpaper Letters before ever learning the letter’s name, ensuring the sound becomes the primary cue. You’ll notice that the three‑period lesson makes the child repeat the sound while tracing, then identify the symbol, and finally produce the phoneme alone. This multisensory routine builds a concrete sound‑symbol link, so later you can sound out unfamiliar words without relying on memorized sight words. Introducing only three or four letters at a time prevents overload and lets the child master each phoneme before moving on.
- Hear the phoneme first.
- Trace the Sandpaper Letter while saying the sound.
- Identify the symbol when prompted.
- Produce the sound in isolation.
Mastering Small Letter Groups for Word Building
How can you turn a handful of sandpaper letters into confident word building? You start with three‑to‑four‑letter groups, letting each set sink in before you move on. In Period 2 you feel and see each Sandpaper Letter, confirming its shape and sound. That tactile focus sharpens phonetic awareness, so when you trace the letters you already know the phonemes they represent. Once you master the group, you blend the sounds into simple words, keeping the vocabulary manageable and the cognitive load low. The three‑period lesson repeats recognition, then production, reinforcing the sound‑symbol link. By progressing in small, sensory‑rich clusters, you build a solid foundation for word construction without overwhelming the learner.
Using Keyword Picture Cards to Strengthen Sound‑Symbol Links
After mastering small letter groups, you can deepen the sound‑symbol connection by adding keyword picture cards. You’ll see how a single image can trigger the phoneme, the sandpaper letter, and the meaning all at once. Mnemonics make the link vivid, so children recall the sound faster and retain it longer. Use the three‑period lesson structure to introduce cards in Period 2, then let kids match them in Period 3. The visual cue reinforces the tactile feel of the letter, turning abstract symbols into concrete concepts.
- Choose pictures that start with the target sound.
- Pair each picture with the corresponding sandpaper letter.
- Prompt the learner to name the sound while pointing to the card.
- Encourage the child to say the keyword, strengthening the mnemonic bridge.
Creating Effective Picture Cards for Sandpaper Letters
What makes a picture card truly effective for sandpaper letters is its ability to link a vivid image, the target phoneme, and the tactile letter in a single, memorable cue. Choose a clear, high‑contrast illustration that begins with the letter’s sound—like a bright “B” with a banana. Keep the word short, preferably one syllable, so the child can instantly associate the picture with the phoneme. Place the sandpaper letter on the back or edge, letting the child feel the texture while looking at the image. Use durable cardstock and laminate the cards for repeated handling. Arrange the cards in the three‑period lesson sequence, so identification in Period 2 and naming in Period 3 become automatic multimodal rehearsals. This strategy turns abstract symbols into concrete, memorable anchors.
Recording Progress With Simple Sandpaper Letter Booklets
When the picture cards are in place, the next step is to capture each child’s growing mastery with a simple sandpaper‑letter booklet. You place the child’s name on the front cover, then underline a letter each time you teach it. When the sound‑symbol link solidifies, you circle the same letter, giving you an instant visual cue. End‑of‑lesson pages pair the letter with key words, reinforcing handwriting and the “why” behind each sound. Frequent post‑lesson reviews prompt the child to read those words, cementing the connection. Keep the booklets on a low shelf for free‑choice access, so kids can self‑directed review anytime.
Common Tracing Errors and How to Fix Them
Ever notice how a single mis‑step in tracing can lock a wrong motor pattern into a child’s memory? When a child veers off the letter shape, pause, re‑present the starting point, and have them begin again, emphasizing where tracing starts. Use the three‑period lesson: trace and sound, identify, then name the sound. This repetition rewires muscle memory and prevents the error from solidifying. Avoid signaling mistakes mid‑practice; instead, request another turn and guide the next tracing pass with clear direction. Begin each session with a tightly guided demonstration of start location and movement direction. Group letters in small sets of three or four, ensuring mastery of each group’s tracing and sound before moving on, so cross‑letter confusion doesn’t propagate.
Frequently Asked Questions
How Long Does It Take for Children to Recognize Letters Without Tracing?
You’ll typically see children start recognizing letters after a few weeks of consistent exposure, but most need two to three months of regular practice before they reliably identify them without tracing.
Can Sandpaper Letters Be Used for Children With Visual Impairments?
Yes, you can use sandpaper letters for visually impaired children; the tactile texture lets them feel each shape, reinforcing letter recognition and building confidence even when vision is limited.
What Age Range Benefits Most From Tactile Letter Activities?
You’ll see the biggest gains in children aged three to seven, when they’re just mastering letter shapes and sounds; tactile letters reinforce motor‑sensory connections, boosting early literacy and confidence.
Do Sandpaper Letters Improve Spelling Accuracy in Later Grades?
You’ll see modest gains; sandpaper letters boost early phonemic awareness, which later translates into slightly higher spelling accuracy in middle school, especially for kids who practiced consistently.
How Often Should Sandpaper Letters Be Incorporated Into Daily Lessons?
You should use sandpaper letters in every lesson, aiming for three to five minutes of tactile practice daily, so the repeated sensory exposure reinforces letter shapes and supports abstract reading development.