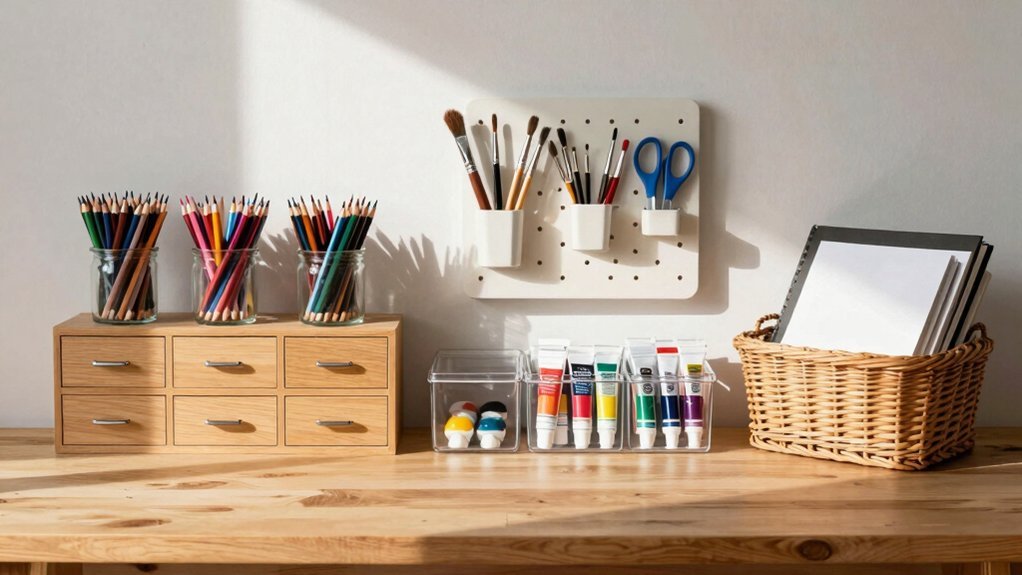
Create zones in your studio—central flat‑material area, left/right tool zones—to keep everything in its place and cut waste. Assign dedicated media zones like a painting wall, lettering drawer, and dry‑media desk, and label or color‑code containers for quick spot‑and‑return. Use transparent, stackable bins with dividers so you can see supplies and avoid mixing. Install low, adjustable shelves and a pegboard for eye‑level access and modular storage. Apply a one‑in‑one‑out rule and schedule brief monthly audits to stay tidy, and you’ll discover even more tricks to streamline your creative space.
Why Zoning Your Studio Improves Art‑Supplies Organization

Why zone your studio? You’ll boost organization and cut waste by carving the space into distinct zones. A clear middle zone holds paper and flat materials, while the left and right zones host specific tool types, so your workflow stays smooth and movement drops.
Group art supplies by category, then stash them in labeled bins or color‑coded containers within each zone; you’ll see everything at a glance and return items to the right spot instantly.
Install wall‑mounted or vertical storage near each area to free floor space and keep frequently used tools within arm’s reach. This accessibility, coupled with a consistent zoning map, prevents cross‑contamination and keeps your studio layout efficient, tidy, and ready for any project. Using well-designed tools with foldable/portable designs can also help maximize space efficiency in your creative area.
Set Up Dedicated Media Zones for Clear Art‑Supplies Separation
Ever wondered how a tidy studio can boost your creativity? By creating dedicated media zones, you keep art supplies organized, prevent cross‑over, and make everything instantly accessible. Use vertical storage and clear labeling to turn chaos into a streamlined workflow.
- Define zones – Assign a painting wall, a lettering drawer, and a dry‑media desk; keep each type in its own area.
- Choose storage bins – Opt for transparent or labeled containers; they’re easy to spot and return to.
- Employ vertical storage – Install pegboards, hanging metal containers, or wall‑mounted rails to keep frequently used items within arm’s reach.
- Add color‑coding – Arrange subsets by hue or rainbow order inside each zone for rapid selection and visual harmony.
These steps give you clear separation, fast retrieval, and a studio that fuels inspiration.
Use Transparent, Stackable Bins for Art‑Supplies Labeling

Looking for a quick way to see exactly what you need without rummaging through drawers? Grab transparent bins and sort your art supplies by category—paintbrushes, markers, oil paints, pencils—then label each bin. The clear containers give you instant visibility, so you spot colors or tools at a glance. Use stackable storage to build a vertical tower; it maximizes floor space and keeps everything within quick access. Slip dividers inside the bins to keep tiny items separate and prevent mixing. When you finish a project, return each piece to its labeled bin and the uniform organization stays intact. Position the stack on a short wall or under a slanted ceiling, and you’ll always know where everything lives. Incorporating principles of open-ended exploration can further enhance creativity and organization in your art space.
Add Low Shelves and Pegboards for Easy Access to Supplies
If you want your studio to stay organized while keeping everything within arm’s reach, install low, adjustable shelves and a pegboard wall. These pieces let you maximize vertical space, keep art supplies at eye level, and adapt storage as your collection changes. Labels on each shelf or bin cut search time, while the pegboard holds brushes, tools, and small containers within easy accessibility. Combining a hanging rail with metal bins creates a modular, open‑access workspace that boosts organization and workflow flow.
- Mount a pegboard at waist height for quick brush and tool access.
- Add low shelving units with adjustable heights for larger art supplies.
- Use clear labels on every shelf and bin to streamline retrieval.
- Incorporate small shelves on the pegboard for frequently used items.
Consider using modular storage cubes with waterproof melamine surfaces for durability and easy cleaning in art studios.
Swap Out Art‑Supplies Regularly – One In, One Out Keeps Your Studio Tidy

Why let your studio become a cluttered graveyard of half‑used supplies? Adopt a one‑in‑one‑out rule and keep a dust‑free workspace. When a fresh paint tube arrives, pull the empty one from the same color family and drop it into a labeled purge bin or drawer storage. This habit forces regular space management and prevents duplicate items from piling up.
Schedule a monthly audit—15 minutes tops—to scan storage bins, identify low‑usage consumables, and swap them out. Prioritize consumables over non‑consumables, so you always have room for tools you actually use. Applying principles like age range and learning scope helps tailor your creative space to your evolving artistic skills and needs.
Frequently Asked Questions
What Is the 70 30 Rule in Art?
You follow the 70/30 rule by spending roughly 70% of your studio time creating and refining work, and the remaining 30% organizing, storing, and preparing supplies to keep your workflow efficient.
How to Organize a Lot of Art Supplies?
You should sort everything into labeled bins or drawers, group like items together, use clear containers for quick visibility, and add vertical shelves or pegboards to keep everything accessible and uncluttered.
What Is the 2 3 Rule in Art?
You keep two‑thirds of your materials within easy reach—palette, brushes, tools—while storing the remaining one‑third up high or in closed containers, so you stay organized and avoid clutter.
What Are the 3 C’s of Art?
You’ll find the three C’s are color—choosing and arranging hues deliberately; composition—structuring elements for balance and focus; and chiaroscuro—using strong light‑dark contrasts to model form and depth.