
You can turn kitchen staples and cheap toys into ten fun sensory bins that boost motor skills, language, and curiosity while staying safe and tidy. Start with a clean surface, gather a bin, scoops, rice, pasta, beans, or pom‑poms, and add age‑appropriate toys like plastic animals or gems. Mix in colored rice, water with food‑safe dye, or glitter for themed bins, and use tools such as funnels, tongs, and colanders for scooping and sorting. Each bin offers a simple setup, clear safety tips, and a story or challenge to keep kids engaged, and the next sections will show you how to expand these ideas further.
Gather Materials & Set Up a Safe Play Space
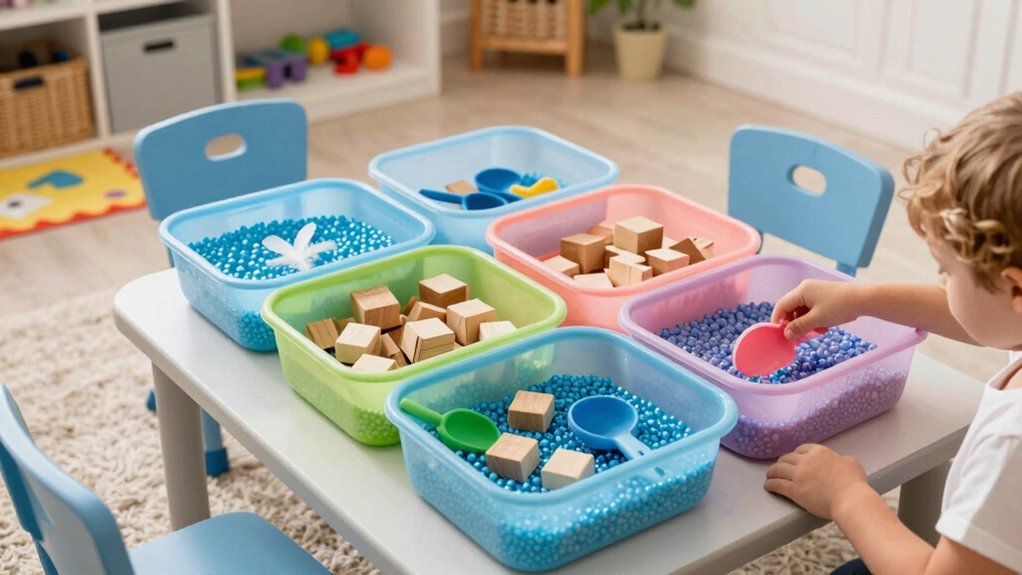
A clean, protected surface is the foundation of a safe sensory bin, so lay down a sheet or towel before you start. You gather a storage bin or large mixing bowl, a snug lid, kitchen scoops, spoons, and measuring cups, keeping everything within arm’s reach. Choose dry fillers like pasta, rice, or beans—steer clear of uncooked red kidney beans because they pose choking hazards. Add age‑appropriate small toys or plastic animals for manipulatives, and arrange all tools on the sheet to contain mess. This setup safety step ensures the play area stays tidy, the floor stays protected, and your child can explore sensory play independently while you supervise. In addition, incorporating self-correcting materials can encourage independence and enhance concentration during play.
Make a Simple DIY Rice Sensory Bin for Toddlers
Creating a simple DIY rice sensory bin for toddlers is quick and inexpensive: just fill a large bowl with plain or food‑colored rice, spread a protective sheet underneath, and add a handful of scoops, funnels, and small plastic animals. You’ll notice the bright rice invites tactile exploration while the tools develop fine‑motor skills. Keep safety front‑and‑center by supervising, choosing dry rice, and avoiding tiny pieces that could pose choking hazards. Arrange the bin on a washable mat or table covered with a towel for easy cleanup. Encourage themed play—like ocean adventures or color sorting—by grouping animals or colored rice sections. The setup stays low‑cost, portable, and adaptable, making sensory bins a go‑to learning resource at home. Incorporating fine motor skill development tools like wooden pattern blocks from quality educational sets can further enrich the experience.
Create a DIY Color‑Sorting Pom Pom Sensory Bin
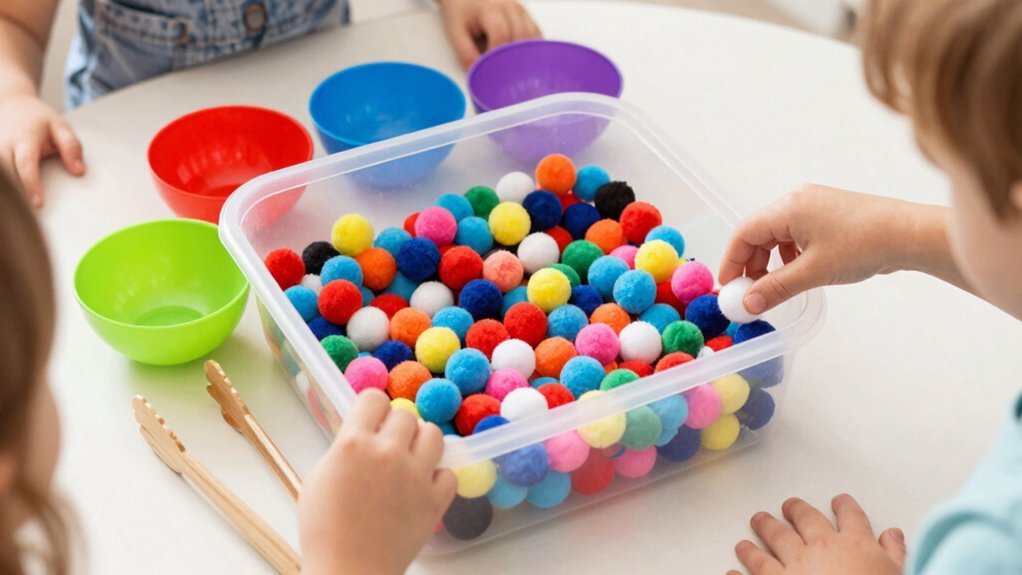
Looking for a quick, engaging way to boost color recognition and fine‑motor skills? Fill clear bowls with bright pom poms and a contrasting filler like beans. Hand kids tongs or tweezers so they can scoop, transfer, and sort the pom poms into matching containers. Use color‑coded cards as a guide; the kids will name each hue while they work, reinforcing early literacy. Keep everything non‑toxic and supervise to avoid small‑part hazards. Spice things up with shade‑intensity challenges or primary‑vs‑secondary groupings for deeper learning. Adding sensory bins to a child-friendly garden stand setup can further enhance fine-motor practice and outdoor learning experiences.
| Tool | Purpose | Example |
|---|---|---|
| Tongs | Fine‑motor practice | Small kitchen tongs |
| Color cards | Prompt sorting | Red, blue, green cards |
| Beans | Filler contrast | Dried beans or rice |
| Bowls | Sorting stations | Clear plastic cups |
Build a DIY Treasure Hunt Bin With Rice & Gems
Ever wondered how to turn a simple rice bin into an underwater treasure quest? Start by dyeing plain rice a deep ocean blue, then scatter glittering blue gems and pirate‑themed trinkets throughout. Offer cups, bowls, and spoons as digging tools, letting your child scoop, sift, and search the rice sea. The non‑chokable, oversized gems stay safe while encouraging fine‑motor practice and problem‑solving.
As they uncover each gem, weave a story about hidden loot and daring explorers, turning the sensory bins experience into a vivid treasure hunt. Keep adult supervision nearby, ensure all pieces are large enough to avoid swallowing, and celebrate every discovery with enthusiastic high‑fives. This simple setup transforms playtime into an educational adventure. Using a Montessori-friendly step stool can also help young children access and engage fully with sensory bins, fostering independence and safe exploration.
Set Up a DIY Pom Pom Soup Fishing Bin
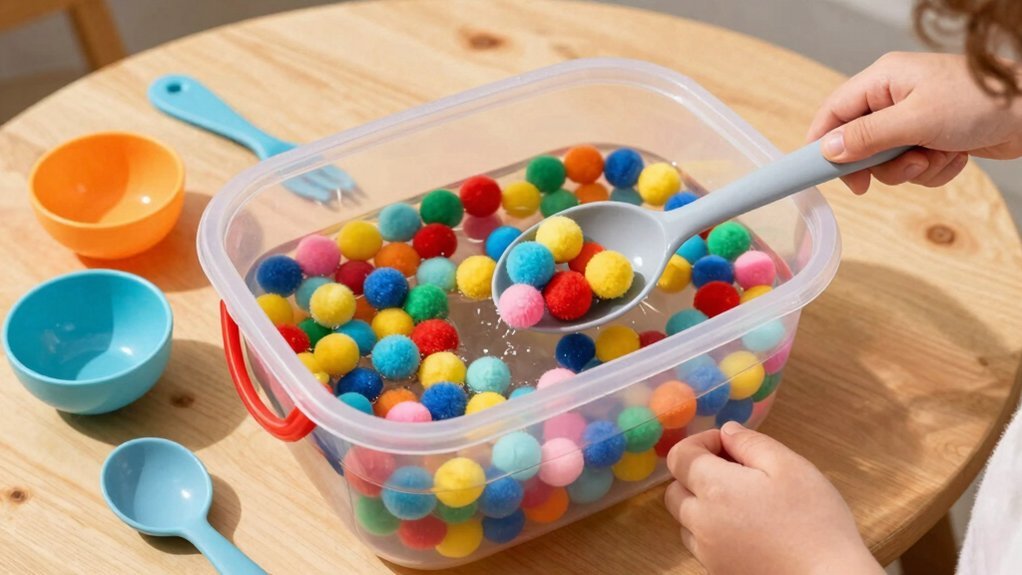
Pick waterproof, color‑fast pom poms that sink or float depending on the skill you want to target, and you’ll instantly add a visual cue for sorting and counting.
Swap a traditional rod for a lightweight mini scoop or a paperclip “hook” to keep grip practice safe and easy.
Mix in small cups, spoons, and a strainer so the water play stays varied while you explore buoyancy and fine motor control.
Consider incorporating tools with soft bristles like mini sweepers to help children develop tactile sensory experiences during cleanup and play.
Pom Pom Selection Tips
Which pom pom size and texture will keep tiny hands engaged while fishing? Choose pom poms that are big enough to grasp yet light enough to float. A ½‑inch diameter gives a satisfying “pop” when kids scoop them, while a slightly larger ¾‑inch ball challenges fine motor skills. Textured fibers add grip, preventing slippery slips, and smooth fibers let the pom glide for a different tactile experience. Mix colors for sorting games, but keep the count low to avoid overwhelm. Always supervise to avoid choking hazards and ensure tools stay within reach. Selecting materials that are BPA-free and safe ensures a worry-free sensory play experience.
| Size | Texture | Best Use |
|---|---|---|
| ½‑in | Smooth | Easy scooping |
| ½‑in | Fuzzy | Grip practice |
| ¾‑in | Smooth | Coordination boost |
| ¾‑in | Fuzzy | Sensory depth |
Fishing Rod Alternatives
Choosing the right tool to pull pom poms out of the “soup” keeps the activity lively and builds fine‑motor control. In your sensory bins, replace a traditional fishing rod with a small net, a slender wand tipped with a magnet, or a spoon tied to a string. Each fishing rod alternative lets toddlers scoop, dip, or magnetically attract pom poms, encouraging hand‑eye coordination. Fill a clear bin with blue‑tinted water, add contrasting pom pom colors, and let the child experiment with the chosen tool. Supervise closely to avoid choking hazards, and use the moment to count, sort by color, or name the “fish” they retrieve. This simple swap boosts engagement while keeping the pom safe and educational.
Make a DIY Bath‑Toy Water Bin for Fine‑Motor Practice
Pick a sturdy tub, fill it with water, and add a handful of bath‑toy scoops and cups. Arrange the water base so the toys float and the small manipulatives are easy to reach. Then prompt your child to scoop, pour, and squeeze, watching their pincer grasp and coordination improve with each splash. Using tools with ergonomic handles can help young children develop fine-motor skills more comfortably and safely.
Choose Materials
A good DIY bath‑toy water bin starts with a shallow, clear container that lets you see the toys as they float, and a few safe, water‑proof items like rubber ducks, small boats, or silicone cups for scooping. Choose Sensory Materials that are non‑toxic, taste‑safe, and easy to clean. Clear plastic bowls or a shallow basin work well because you can track submerged objects and boost hand‑eye coordination. Add silicone spatulas, soft mesh nets, or small plastic scoops for varied grip practice. If you want color, drop a few drops of food‑grade dye or a few colored ice cubes—these melt without mess. Keep a waterproof mat underneath and ensure every piece is large enough to avoid choking hazards while supervising closely.
Set Up Water Base
Wonder how a simple water base can turn everyday bath toys into a fine‑motor playground?
Start by placing a shallow, sturdy tray or plastic tub on a protected surface, then fill it with a few inches of lukewarm water. Add a couple of drops of food‑safe color or a tablet for visual interest, but keep the water clear enough to see the toys. Scatter non‑slip, non‑toxic bath toys, small scoops, and measuring spoons across the water base. Include a baster and a few cups to invite pouring, transferring, and grasping. Keep the setup low enough for easy reach, and stay nearby to supervise. This sensory bins water base encourages precise grips and controlled movements while limiting mess.
Encourage Motor Skills
Fill a shallow tray with lukewarm water, then drop in a handful of bath‑safe toys, cups, spoons, and a colander to create a DIY water bin that sharpens fine‑motor skills. You’ll notice how children instantly engage, scooping, pouring, and squeezing, which builds hand‑eye coordination and strengthens tiny muscles. Add a splash of food‑grade coloring or a fizzing tablet for extra resistance, and keep the items age‑appropriate—no tiny beads for toddlers. Supervise closely, then guide play with prompts like “move the largest cup to the left” or “count how many spoons fit in the colander.” This sensory bins approach turns simple water play into a focused motor skills workout.
Use cups, spoons, and a colander for precise scooping.
Introduce safe coloring or fizzies for resistance.
Offer guided sorting and transfer challenges.
Create a DIY Animal Swimming‑Pool Bin With Blue Drink Mix
Creating a DIY animal swimming‑pool bin with a blue drink mix transforms a simple container into a vibrant aquatic playground for toddlers. You’ll fill a shallow bin with water, stir in a non‑toxic blue drink mix, and drop in small plastic animals and water‑safe toys. The vivid hue sparks curiosity while the toys invite scooping, pouring, and chasing, letting kids practice fine motor skills. Provide plastic scoops, cups, or spoons so they can move creatures in and out, exploring buoyancy and cause‑and‑effect. Keep a close eye on tiny parts and verify that both mix and toys are age‑appropriate. This low‑cost, hands‑on setup embodies the DIY sensory bins philosophy, offering endless, safe exploration.
Assemble a DIY Sunken‑Treasure Rescue Bin With Pirate Toys
After the splash‑filled animal pool, you can swap the water for a blue‑dyed rice sea and hide pirate loot beneath it. Fill a clear bin with the dyed rice, then scatter inexpensive pirate coins, toy ships, and glittery gems. Offer scoops, small cups, and a colander so kids can dig, sift, and retrieve the hidden treasure. Their hands feel the cool rice, the smooth metal coins, and the soft gems, reinforcing sensory discrimination while they narrate a treasure hunt. Adult supervision ensures tiny parts stay safe and guides independent exploration.
- Blue rice sea base
- Pirate‑themed treasure pieces
- Simple scooping tools for fine‑motor practice
Make a DIY Bubble‑Cutter Bin for Mess‑Free Fun
A bubble‑cutter bin turns simple soapy water into a mess‑free playground where kids can scoop, press, and lift bubbles shaped by cookie cutters, sharpening fine‑motor control and shape recognition while staying tidy.
Set a shallow sensory bin with a few inches of water, a splash of dish soap, and a handful of plastic cookie cutters within easy reach. Add a small scoop or tongs so they can transfer bubbles without spilling, keeping play mess‑free. Choose age‑appropriate cutters and supervise to avoid choking, especially with toddlers who might mouth pieces. Enhance the experience with a drop of food coloring or a scented soap for extra sensory cues. The result is a compact, low‑cleanup activity that builds fine‑motor skills and shape awareness.
Create a DIY Glowing Bubble Bin for Light‑Play Exploration
Swap the bubble‑cutter cutters for a few glow sticks and watch ordinary soapy water transform into a luminous playground. Fill a clear sensory bin with water, add a splash of dish soap, and gently submerge activated glow sticks (outside the water) to tint the bubbles. Supervise closely, keep the bin on a protected surface, and ensure toddlers don’t bite the sticks. As they scoop, stir, and chase glowing or, they develop fine motor skills through engaging light‑play. Vary colors by mixing different sticks and tweak temperature or soap concentration for bigger or brighter bubbles.
- Use 2‑4 glow sticks, activated before immersion
- Keep the bin on a washable mat to catch spills
- Rotate stick colors for fresh visual effects
Enjoy a safe, glowing sensory‑bin adventure.
Frequently Asked Questions
How Often Should Sensory Bins Be Cleaned Between Uses?
You should clean sensory bins after each session—wipe them down, rinse if needed, and let them dry before the next use to prevent mold, bacteria, and cross‑contamination.
Can I Use Homemade Materials Instead of Store‑Bought Items?
Yes, you can swap store‑bought stuff for homemade materials—just ensure they’re safe, non‑toxic, and easy to clean. Mix rice, pasta, beans, or shredded paper, and add food‑coloring or essential oils for sensory variety.
What Age Range Is Safe for Small Beads or Pom‑Poms?
You can safely use small beads or pom‑poms for children aged three to eight, but always supervise, avoid choking hazards, and keep them away from toddlers under three. Choose larger beads for younger kids.
How Do I Store Leftover Sensory Materials Without Spoilage?
You store leftover sensory materials in airtight containers, label them, and keep them in a cool, dry place; refrigerate perishable items, and discard anything that smells, clumps, or changes color.
Are There Any Allergy Concerns With Common Bin Fillers?
Yes, you should watch for common allergens like nuts, wheat, or dairy in fillers; opt for hypoallergenic rice, beans, or sand, keep materials sealed, and wash hands before and after each session.