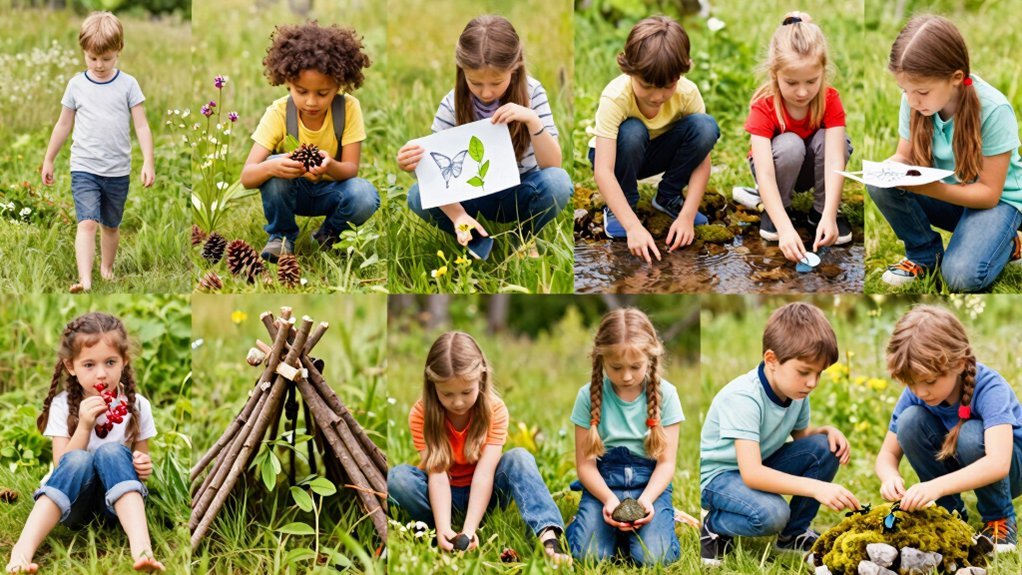
Kick off with a quick barefoot walk, letting kids feel grass, sand, and pebbles while naming colors and listening to bird calls. Set up a multi‑sensory musical forest using bells, water xylophones, and simple instruments to explore pitch and rhythm. Build a tactile wall of varied textures for sorting and description. Create smelling bottles from local plants and rotate them for olfactory play. Try a water‑xylophone to link water levels with sound. Paint with flower petals for color and texture, record nature sounds for analysis, and finish with reflective journaling and group discussion. Keep exploring to discover even more ideas.
Start a Multi‑Sensory Warm‑Up
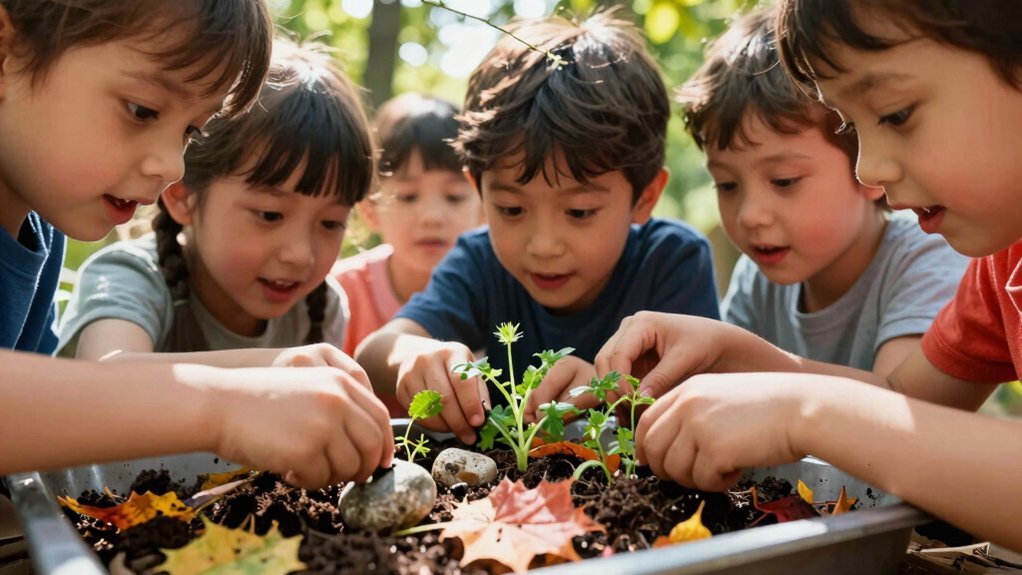
When you begin a multi‑sensory warm‑up, pair a quick nature walk with simple, varied prompts that spark sight, hearing, touch, smell, and proprioception. You’ll guide kids to name colors on leaves, feel bark textures, and listen for bird calls, turning each step into a sensory warm‑up.
Start with visual cues and tactile prompts, then add a brief sound‑map activity where they point to rustling grass or distant traffic. Offer a texture hunt—collect smooth stones, rough bark, soft moss—so they experience varied inputs in five to ten minutes.
Keep safety front‑and‑center by providing seated observation spots and quiet‑time alternatives, ensuring every child can join the nature exploration and engage in multisensory activities without pressure. Using tools with child-safe scissors in crafts afterward can enhance tactile experiences while maintaining safety.
Create a Multi‑Sensory Musical Forest
You can turn a simple forest trail into a lively musical playground by hanging bells, cymbals, and other simple instruments on trees and walking sticks, letting kids hear and feel each note as they move.
Attach a water xylophone and recycled classroom instruments to demonstrate how nature’s materials create distinct sound qualities.
Invite students to explore pitch, rhythm, and timbre as they walk, striking bells or tapping sticks, then pause for a brief meditation using recorded bird calls and rustling leaves to cue focus shifts.
Encourage them to treat the wind, streams, and rustling foliage as improvisational instruments, building a collaborative “sound map” that records each location’s unique tone.
This active exploration sharpens auditory discrimination while fostering teamwork and creative expression.
Incorporating safe and sturdy tools, like those modeled after Montessori step stools, can enhance children’s independent interaction with natural elements during these activities.
Build a Multi‑Sensory Tactile Wall
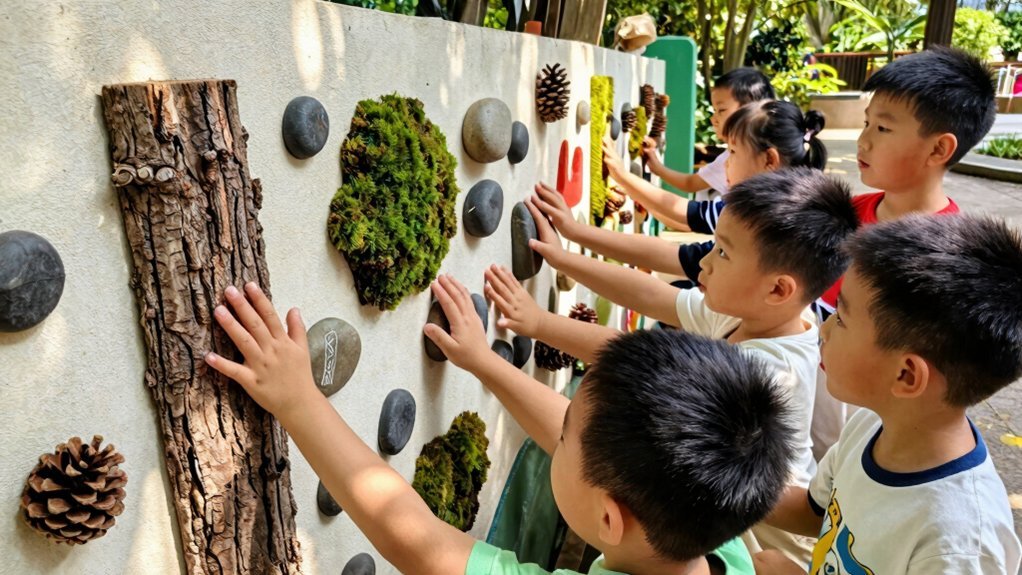
A few simple steps let you turn a classroom wall into a tactile playground that sparks curiosity and fine‑motor skills. You’ll attach panels of varied textures—rough bark, smooth stones, spiky pinecones, soft moss, and safe synthetic pads—creating a tactile wall that invites sensory play. Organize the materials by color or texture, then give students prompts to match, sort, or describe what they feel. Rotate natural materials weekly to keep investigations fresh, and always supervise to avoid hazards like sharp edges or poisonous plants. The wall becomes a dynamic display for ongoing texture scavenger findings, reinforcing learning through touch.
- Collect and clean natural materials (leaves, pinecones, rocks).
- Secure fabric or foam panels for soft and hard textures.
- Add removable trays of sand, water beads, or shaving‑cream‑like gel.
- Label each section with simple icons for guided prompts.
- Rotate items regularly and inspect for safety.
Incorporating Montessori-inspired materials with non-toxic finishes can enhance the sensory experience while ensuring safe exploration.
Lead a Multi‑Sensory Barefoot Walk for Proprioception
The barefoot walk turns the classroom or playground into a living sensor board, letting kids feel grass, sand, pebbles and cool water under their feet while their proprioceptive system maps each texture to body position and balance. You guide them to notice how each surface shifts weight, steadies posture, and sparks curiosity. Prompt reflections like “What does the sand do to your steps?” to deepen proprioception. After the walk, let them sort collected shells, leaves, or stones, reinforcing texture awareness. Safety stays top‑priority: set clear boundaries, supervise closely, and choose soft, clean areas. This multi‑sensory barefoot walk builds confidence, focus, and a tactile vocabulary they’ll carry into future explorations.
| Surface | Sensation | Prompt |
|---|---|---|
| Grass | Soft, cool | “How does it feel under your heel?” |
| Sand | Grainy, shifting | “What changes when you lift your foot?” |
| Pebbles | Rough, firm | “Where does your balance shift?” |
Make Multi‑Sensory Smelling Bottles From Local Plants
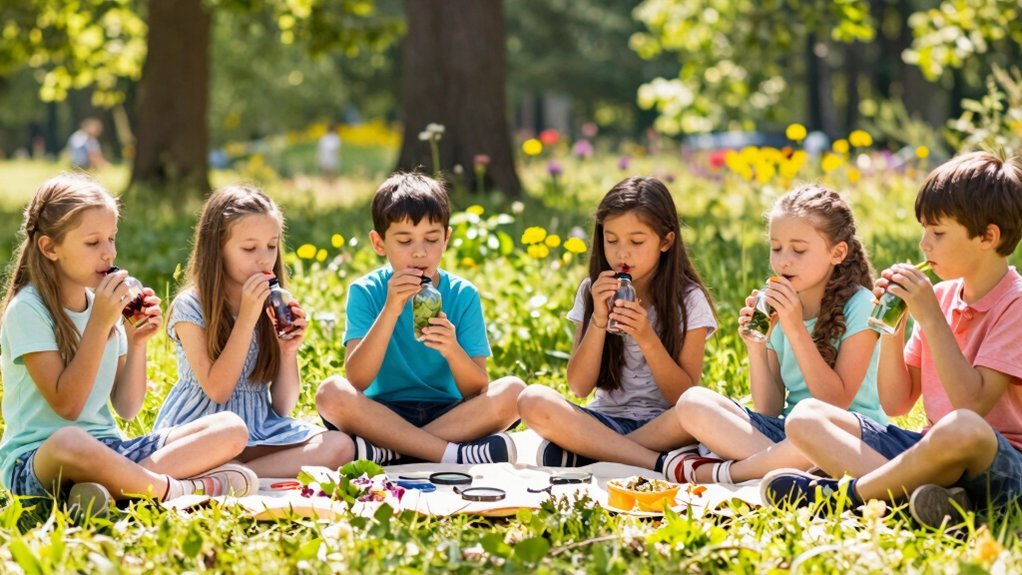
Often, kids can explore their environment’s aromas by creating sealed smelling bottles filled with local plants, turning simple jars into portable scent labs. You’ll gather fresh flowers, leaves, bark, or soil, then place a small amount in a clean jar. Secure the lid or a fabric cover dampened with a safe essential scent to lock in the smell while preventing spills. Label each bottle with the plant name and a vivid scent word, then invite children to compare aromas, draw their impressions, and write brief journal entries. This hands‑on activity deepens scent exploration, sharpens descriptive language, and enriches nature study by linking olfactory cues to visual and tactile observations.
- Collect a variety of local plant parts
- Use airtight jars or bottles with fabric covers
- Add a few drops of a safe essential oil to boost intensity
- Label each container with plant source and scent adjective
- Pair each bottle with a drawing or journal prompt for reflection
Incorporating multi-sensory tools like an abacus can enhance children’s descriptive and cognitive skills by engaging their fine motor and logical thinking abilities through hands-on learning.
Store and Reuse Sensory Bottles for Ongoing Activities
After sealing your smelling bottles, keep them handy for future lessons by storing them in a cool, dry shelf where kids can easily grab a bottle for a quick tactile sorting game. Choose a low‑light spot that stays at room temperature to prevent condensation, and label each bottle with a simple icon that shows its primary content—leaf, rock, stick, or mini‑biome. When you’re ready to reuse, open the cap, dump out the old material, and replace it with fresh finds from the next nature walk. This reuse cycle keeps the sensory experience vivid and ties directly into ongoing nature study themes. Rotate the bottles weekly, letting children compare textures, colors, and sizes, and watch their classification skills sharpen without needing new supplies. Using BPA-free PET plastic bottles ensures durability and safety for repeated use and handling by children.
Try a Water‑Xylophone to Explore Pitch in a Multi‑Sensory Way
Grab a few clear bottles, fill them with different water levels, and line them up on a sturdy tray. As you tap each one, you’ll hear higher pitches from fuller bottles and sharper tones from the slimmer ones, letting you feel the sound change. This simple setup turns a backyard into a hands‑on music lab where sight, touch, and hearing all work together. Exploring pitch through multi-sensory play can enhance fine motor skills as children tap and experiment with sound variations.
Up Materials
Ever wonder how a simple glass of water can become a musical instrument? You’ll need a few everyday nature materials for a quick, hands‑on learning set‑up. Grab clean jars or plastic bottles, a water source, measuring cups, wooden sticks or spoons, and a notebook for predictions. Fill each vessel to a different level, watch the water rise, and listen as the pitch shifts. This sensory exploration lets kids see color‑coded water heights, hear low versus high notes, and feel the vibrations when they tap. Encourage them to guess which jar sounds higher, then test and record the result, reinforcing cause‑and‑effect while keeping the experience calm and rhythmic. For young learners, using tools with ergonomic handles and safe materials can enhance the sensory experience and ensure safety.
Setup Pitch Exploration
Now that the jars are filled and labeled, arrange them on a flat surface in order of water level and tap each with a wooden stick to hear the resulting pitches. You’ll notice higher water levels give lower pitch, while less water produces higher tones. This sensory experiment blends visual cues, auditory feedback, and tactile action, turning a simple kitchen setup into a nature study tool. Encourage kids to reorder jars, create scales, and compare the sounds to streams or rain puddles they’ve observed outdoors. Safety first: keep jars stable, supervise water handling, and use plastic containers for younger explorers. Extend the activity by matching pitch changes to natural water level variations seen on field trips.
| Step | Action | Observation |
|---|---|---|
| 1 | Fill jars with varying water volumes | Different pitches |
| 2 | Label and line up jars by level | Visual order |
| 3 | Tap each with a stick | Auditory feedback |
| 4 | Rearrange to form a scale | Tactile learning |
Design a Flower‑Petal Painting for Color & Texture
You’ll notice how each petal’s shape creates a unique brushstroke, letting you explore form while you paint.
By mixing petals with paint or ink, you’ll discover new textures that emerge from the natural veins and edges.
Try layering different shapes and colors to see how they blend and contrast, revealing the rich possibilities of petal‑based art.
Petal Shape Exploration
How can you turn real flower petals into a vibrant, tactile painting that reveals nature’s color blends and textures? You’ll start by gathering a mix of petals—oval, lanceolate, obovate—then press them onto watercolor paper. As you rub the pigment, notice how the texture of each petal creates subtle color blending, forming a natural palette. Next, arrange the imprints into a wheel or pattern, tracing the outlines to highlight shape differences. Finally, discuss how petal shape influences pollinator attraction and visual perception.
- Collect diverse petals during a sensory scavenger hunt.
- Press petals onto paper to transfer pigment and texture.
- Trace each imprint, noting shape and size.
- Assemble a color‑blended wheel from the prints.
- Talk about how shape affects color perception and pollination.
Texture Mixing Techniques
A handful of fresh petals can become your brushes, letting you blend natural color and texture in a single, vivid painting. First, gather petals of varying thickness and surface roughness, then dip them into a palette of pigments you’ve mixed from earth tones, berries, and crushed leaves. Press each petal onto paper to stamp distinct texture, watching how thicker petals hold more paint and create richer, darker marks while delicate ones fade into subtle washes. Layer additional nature elements—tiny leaves, grass blades, or sand—over the wet paint to build depth. As you work, note which petals leave crisp outlines versus those that bleed into the background. Finish with a gentle water rinse, drying the canvas for a tactile, multi‑layered nature painting that celebrates texture exploration.
Set Up a Nature‑Sound Recording Project and Analyze the Recordings
Gather a portable recorder or a smartphone and head outdoors to capture ambient sounds—wind rustling leaves, water flowing, birds chirping—while noting the date, weather, and exact spot for each clip. You’ll build a nature sounds recording project that feeds into an ecosystem analysis, then compare pitch, timbre, and duration across habitats.
Capture ambient nature sounds, record details, and compare pitch, timbre, and duration across habitats.
- Label each file with location, time of day, and weather notes.
- Include baseline clips of wind, water, leaves, and birds for reference.
- Organize recordings by forest, meadow, and water‑edge zones.
- Use simple software to visualize waveforms and spot frequency differences.
- Create a listening station where kids match sounds to sources and discuss sensory impressions.
Write a Reflective Nature Journal Entry and Lead a Group Discussion
You’ll start by asking, “I wonder how the sounds we recorded changed the way you saw the plants and felt the textures?” Then you’ll guide the group to compare those observations with what they already know, noting any new ideas that emerged. Finally, you’ll wrap up with a quick reflection, asking each child to name one thing they’d like to explore further in the next nature study.
Reflective Writing Prompts
When you step outside with a notebook, you’ll notice how the rustle of leaves and the chirps of birds become clues for a reflective journal entry; describe what you see, compare the birds’ habits to human routines, and weave in sketches of life cycles so your observations turn into evidence‑based reflections that spark lively group discussions. Use reflective prompts to guide nature journaling and focus on observation writing that captures color, sound, and movement. Your entry should link feather patterns to survival strategies, note how a robin’s morning song mirrors a school bell, and illustrate a butterfly’s metamorphosis alongside a child’s growth.
- Prompt: “What does the wind tell you about change?”
- Prompt: “How does a bird’s nest compare to a human home?”
- Prompt: “Describe a moment when you felt part of the ecosystem.”
- Prompt: “What question does the tree’s bark ask you?”
- Prompt: “Sketch a life‑cycle diagram and write a short story about it.”
Group Discussion Strategies
Ever wondered how a simple nature journal can spark a lively group discussion? You start by writing a reflective entry that captures what you saw, heard, and felt during a bird‑watching walk. Then you bring that journal to the circle, prompting each child to share a main idea, note similarities between birds and humans, and ask an “I wonder…” question. Use guided prompts that align with standards like K‑LS1‑1, so the group discussion stays focused on habitat relationships and survival needs. As you record answers, you weave personal observations into the nature study, turning each comment into evidence. End with a quick reflection: summarize insights from the scavenger hunt, highlight favorite natural elements, and plan the next observational discussion.
Frequently Asked Questions
How Can I Adapt Activities for Children With Sensory Processing Challenges?
You’ll simplify textures, limit loud sounds, and give clear visual cues; let kids choose comfortable materials, pace the activity, and provide a quiet “reset” space when sensory overload hits.
What Safety Precautions Are Needed for Outdoor Barefoot Walks?
Check the terrain first, avoid sharp objects, stay on clean paths, keep an eye on temperature, wear sunscreen, bring water, and set clear boundaries so kids know where to turn back if needed.
Can I Use Recycled Materials for Sensory Bottles?
Yes, you can use recycled materials for sensory bottles. Gather clean containers, shredded paper, dried beans, or colorful beads. Seal them tightly, label each bottle, and supervise kids to ensure safe, mess‑free exploration.
How Often Should I Rotate or Replace Sensory Materials?
You should rotate or replace sensory materials every two to three weeks, or whenever they become dirty, broken, or lose their novelty, to keep kids engaged and maintain hygiene.
What Are Age‑Appropriate Ways to Document Observations?
You can use simple journals, photo collages, voice recordings, or digital slideshows—pick tools that match each child’s age, let them draw or type notes, snap pictures, and share findings with friends.